Documentation
How to send a copy of email to the sender?
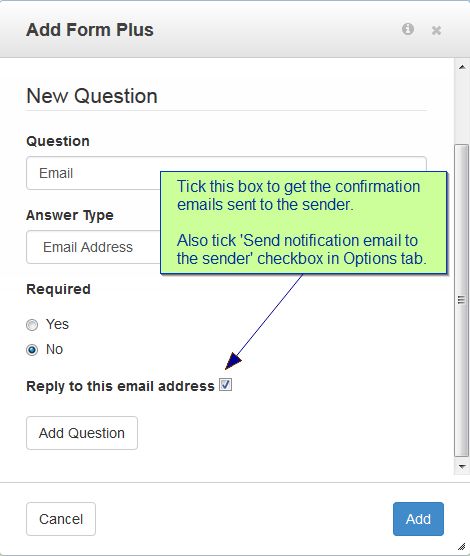
- When you create a form, make sure to tick the "Reply to this email address" box.
- Then in the Options tab, check "Notify me by email when people submit this form" box and enter the admin email address. Further down the same tab, check "Send notification email to the sender". The email sent to the sender will be sent from this email address. NOTE: If you are using multiple email addresses in this field, the email sent to the sender will be sent from the first email address.
Download settings
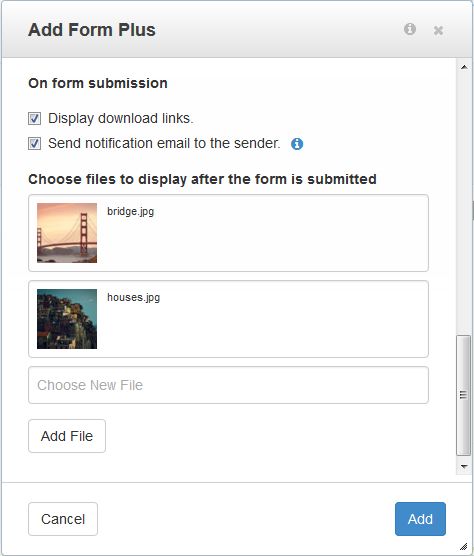
In the Options tab, you will find some additional settings where you can add files that will get displayed when the form is submitted.
Tick "Send notification email to the sender" if you want to send a copy of email to the sender. Also read How to send a copy of email to the sender? above.
Tick "Display download links" if you want to display download links after the form is submitted. This will also include download links in the notification email sent to the sender.
Mailchimp settings
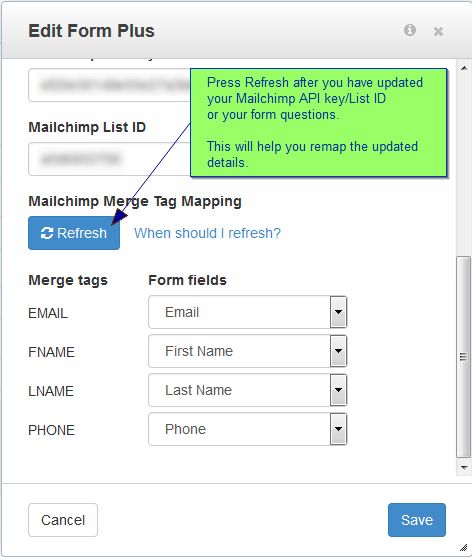
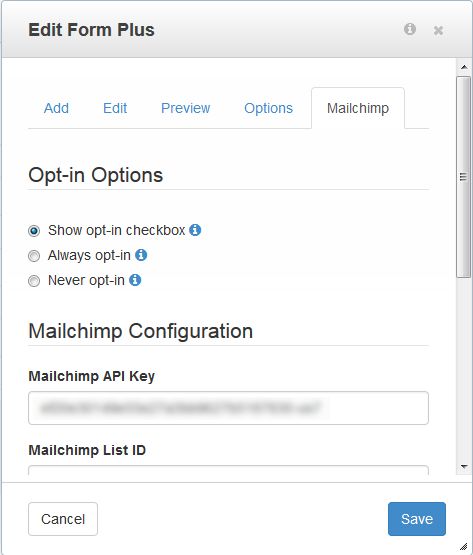
In the Mailchimp tab, enter your MailChimp API Key and List ID. Then press Refresh and map the form fields to your MailChimp merge tags.
Note: Make sure your Mailchimp tags match the form fields to avoid subscription failure. It's fairly straightforward if you use ordinary text fields. It can get a bit tricky once you start using options in your Mailchimp fields. If you've used options within your Mailchimp fields (such as radio buttons or dropdowns), make sure the values sent through FormPlus match the options in your Mailchimp. In order to set this up correctly, use the same field types and options in your FormPlus block.
MailChimp Opt-in Options
In the Mailchimp tab, there are 3 opt-in options for you to choose from. Simply select the one that is relevant to you.
Customising email templates
There are 2 email template files in the package:
- /form_plus/mail/form_plus_notify_receiver_template.php - this is used for emails sent to the admin
- /form_plus/mail/form_plus_notify_sender_template.php - this is used for emails sent to the sender or your customers
If you would like to customise these templates, it is recommended to first copy these files across to the "/application/mail/" folder and then make your modifications. This will prevent these files from getting overwritten everytime you update the add-on.
If you wish to add your HTML code to the template files, you will also have to change all "$body" PHP variables to "$bodyHTML" within the template you are modifying.
Note: On every new add-on release, don't forget to compare your customised template files with the ones in the new version.